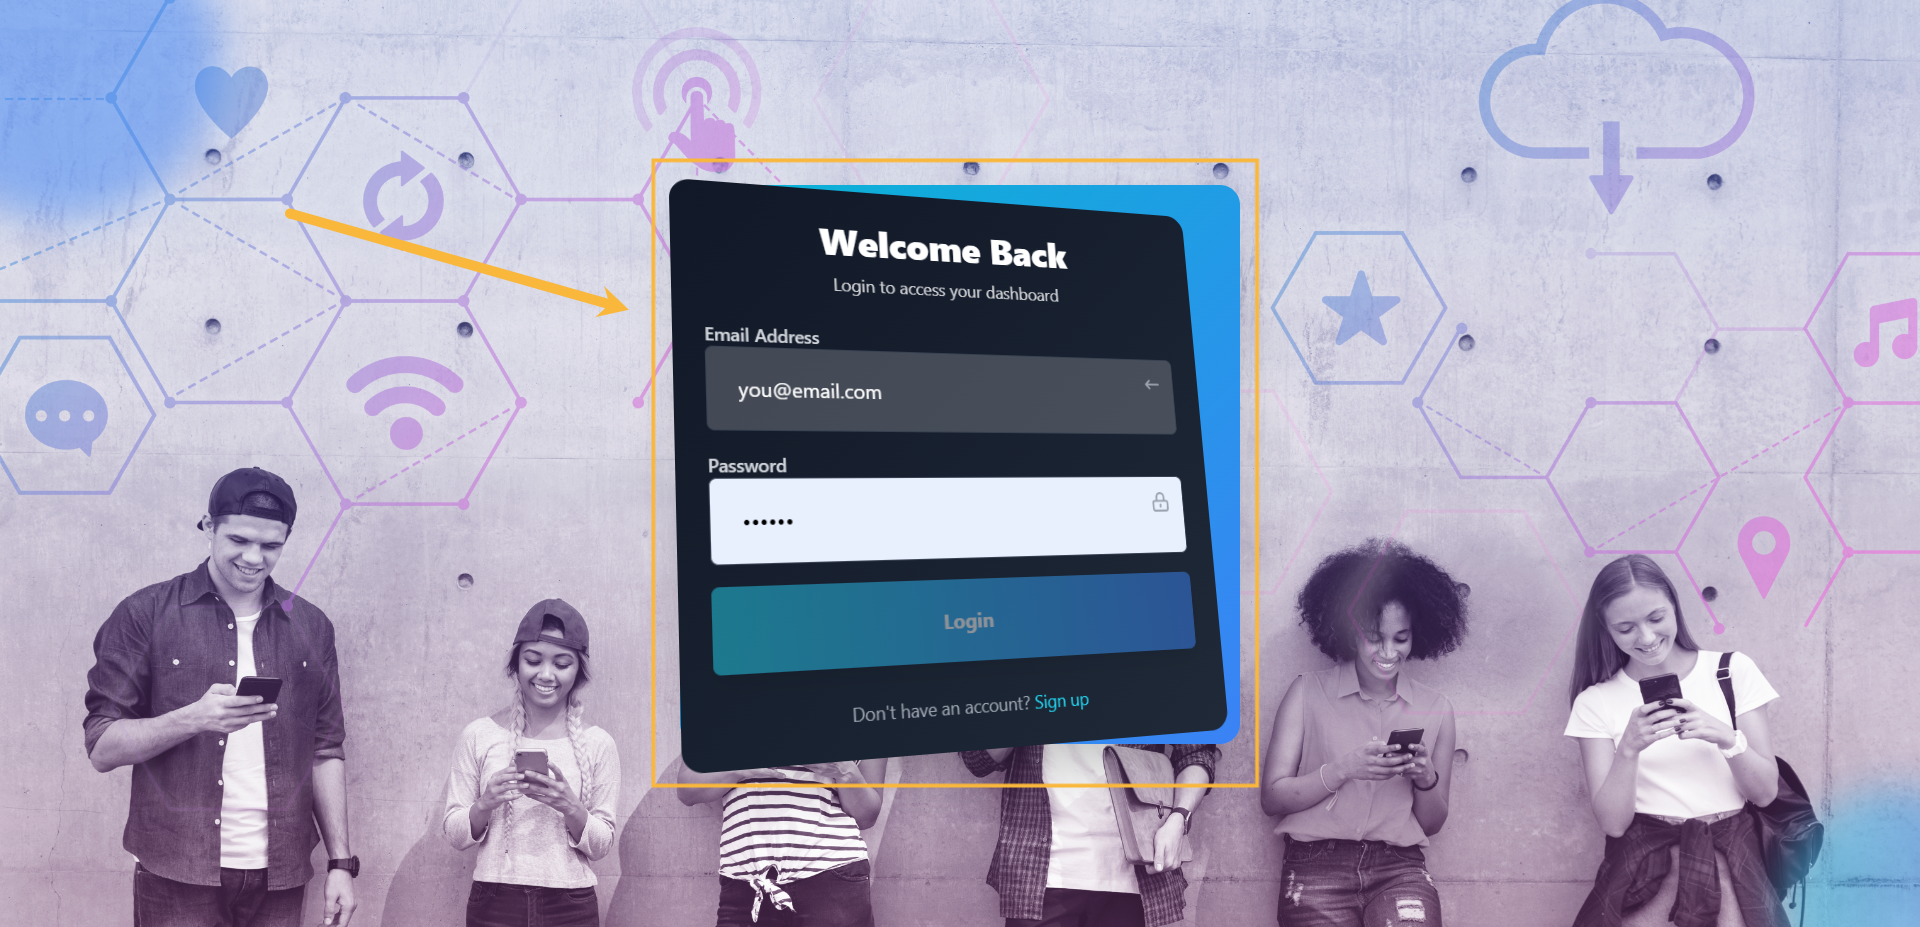
Step#1: Login to your account
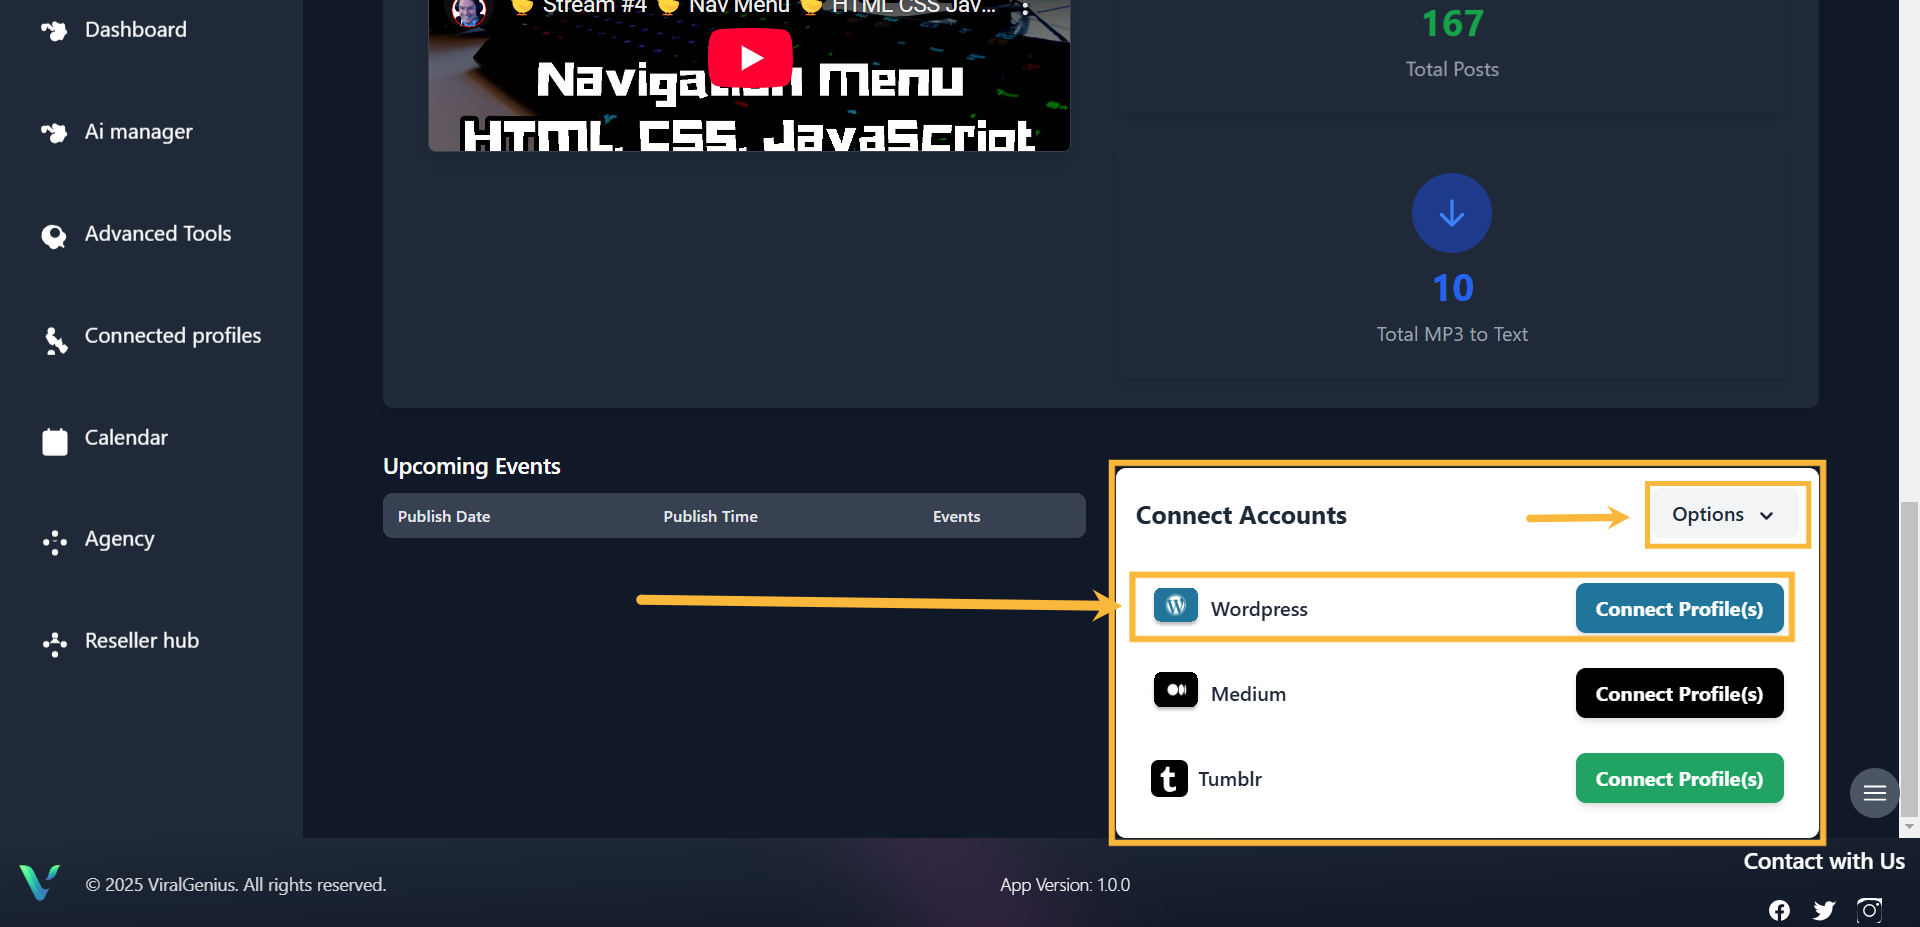
Step #2: Scroll down your dashboard to see all the profiles. Click on Options dropdown and select Blog. You’ll see WordPress then click on Connect Profile
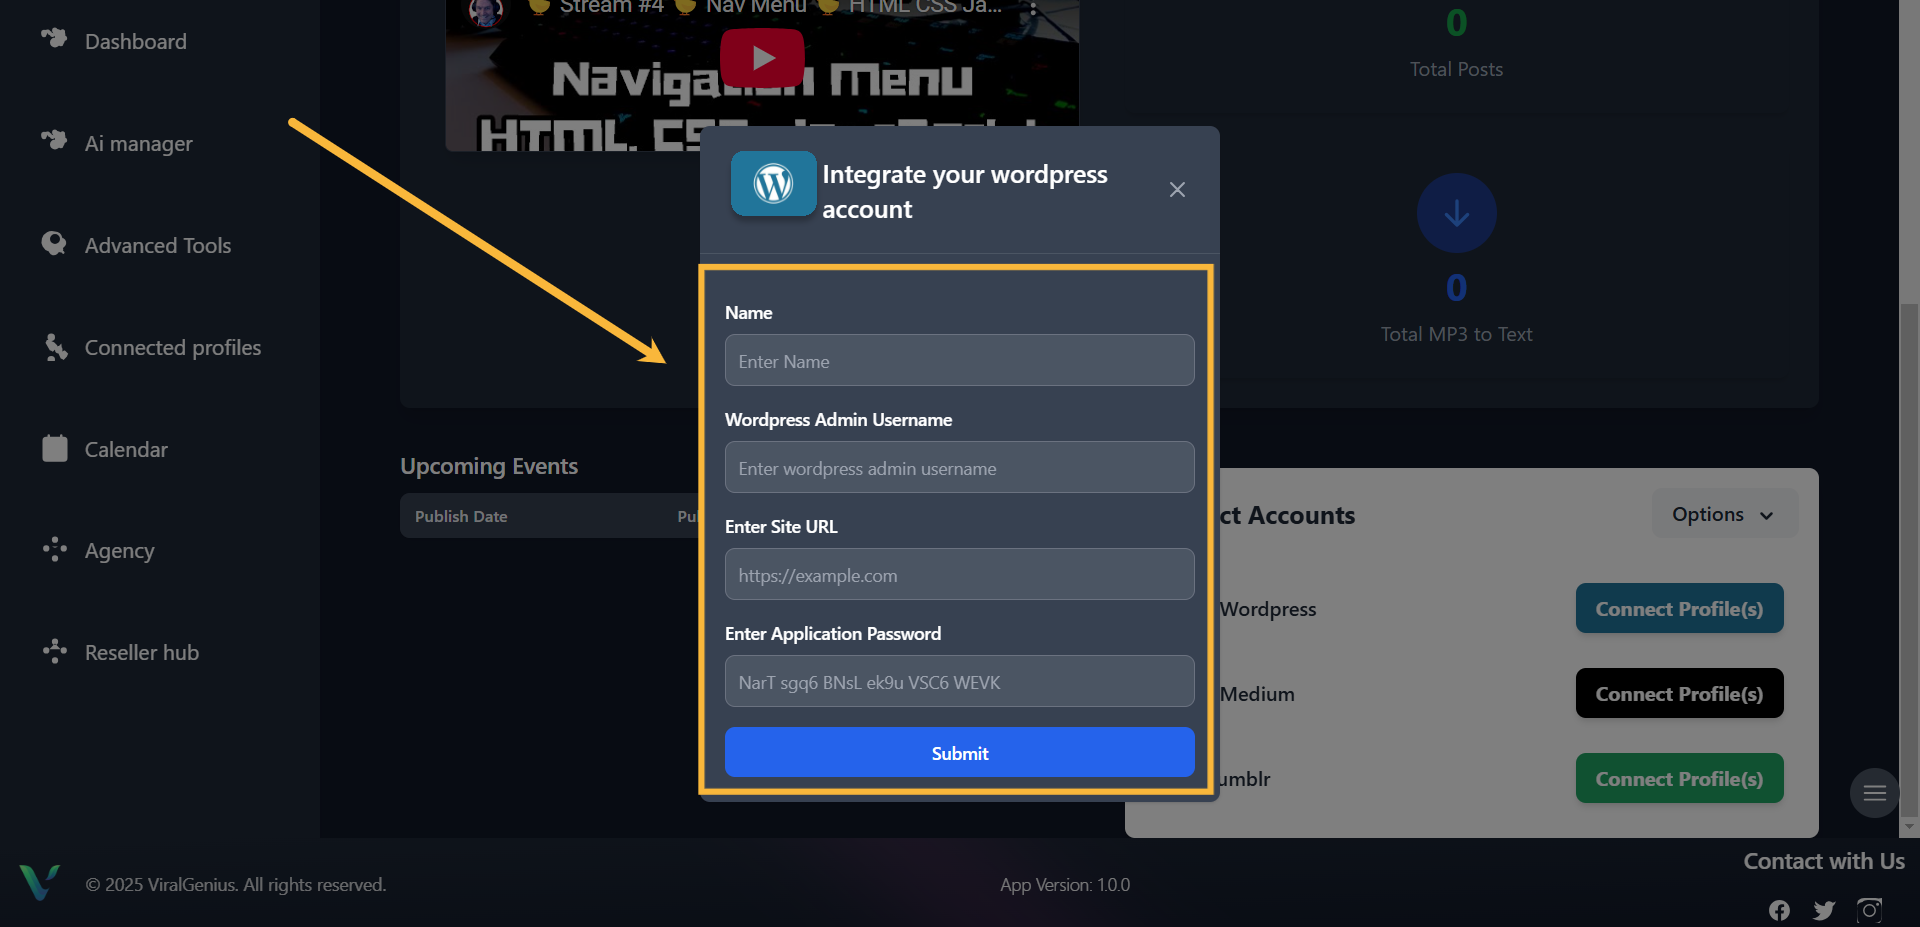
Step #3: Input the Name, Application username, Site URL, and Application password of your WordPress account. To do that, head on to your WordPress account backend.
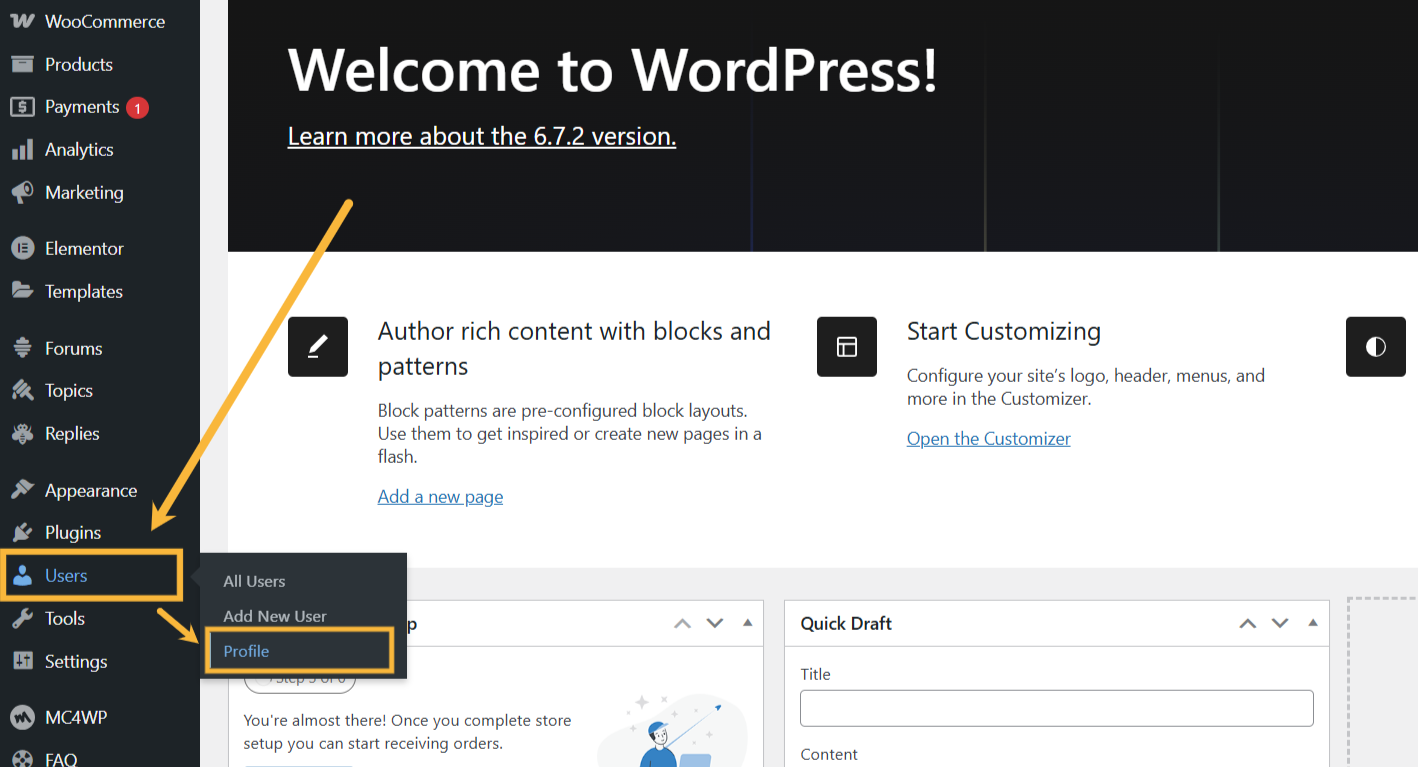
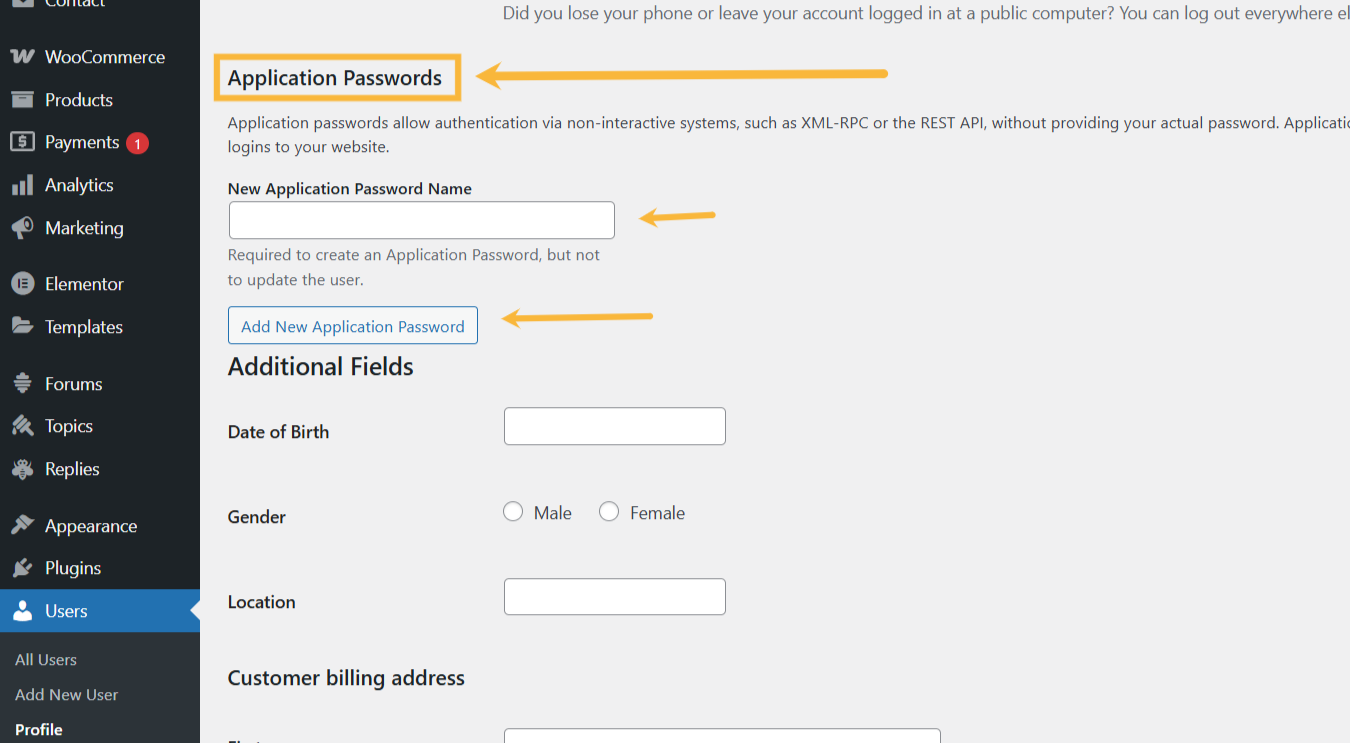
Step 4: When logged in to your WordPress backend, click on “users”, a drop-down will appear, click on Profile
Step 5: In your Profile dashboard scroll down to where you find Application Passwords. Fill in your preferred Application Password Name, after that click on the “Add New Application Password” to generate your application password.
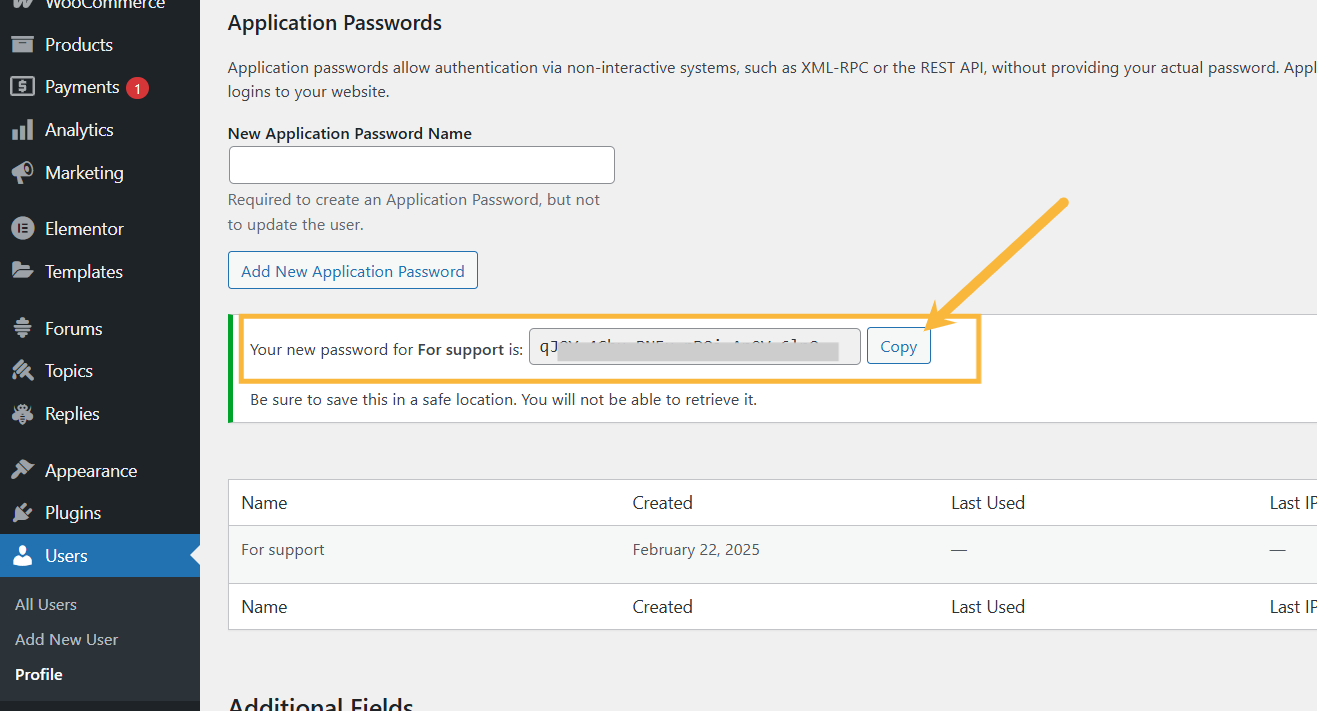
Step 6: Here you will find your Application password generated. Make sure you copy the Application password immediately. It won’t be saved for use later.
Step 7: After you’ve copied your Application Password, go back to ViralGenius and paste your preferred account name, WordPress Admin Username, your wordpress Site URL, and the Application Password you copied. After you have done that, click on Submit.

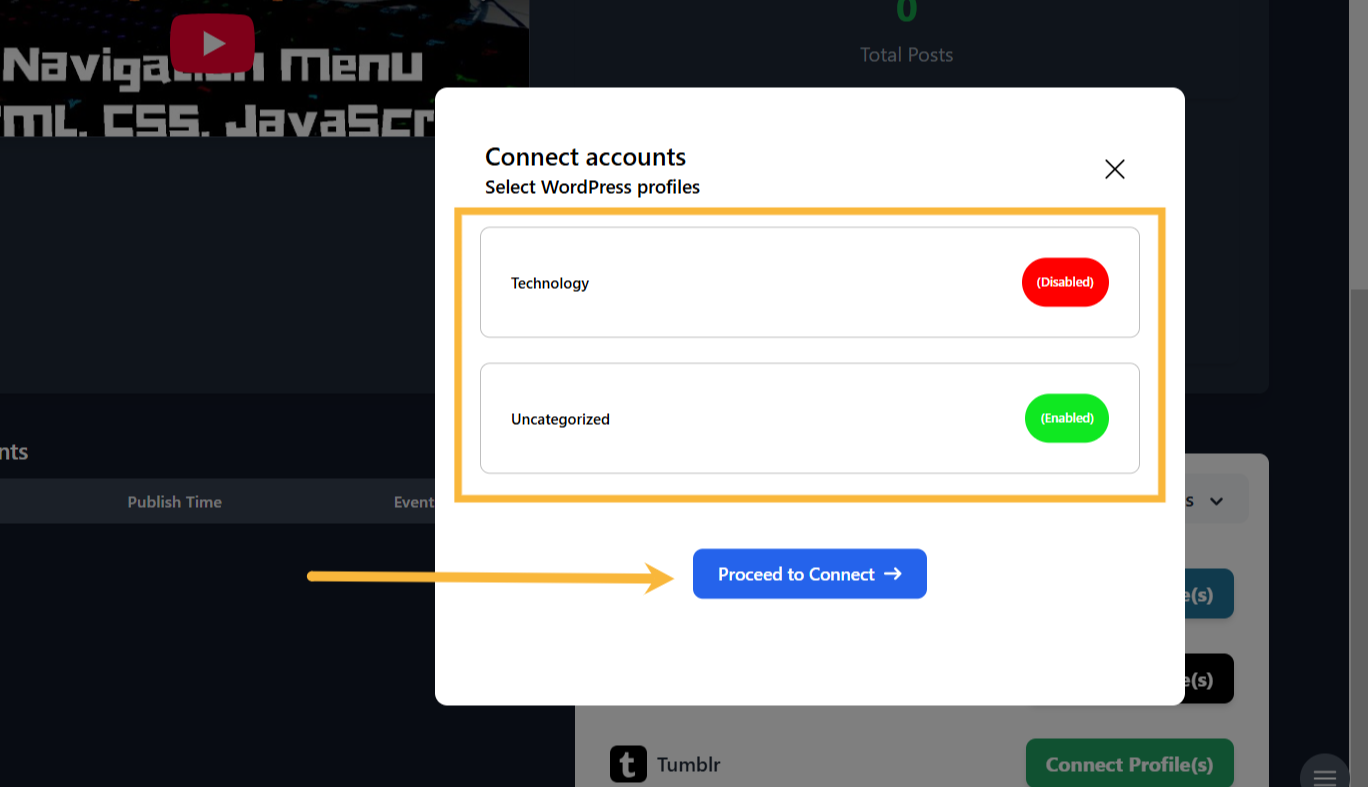
Step 8: A pop-up will appear for you to select the category in your WordPress account where you would like to publish content by enabling or disabling it. After that click on Proceed to Connect
Step #4: Go to Connected Profiles, there you’ll see your Connected WordPress account
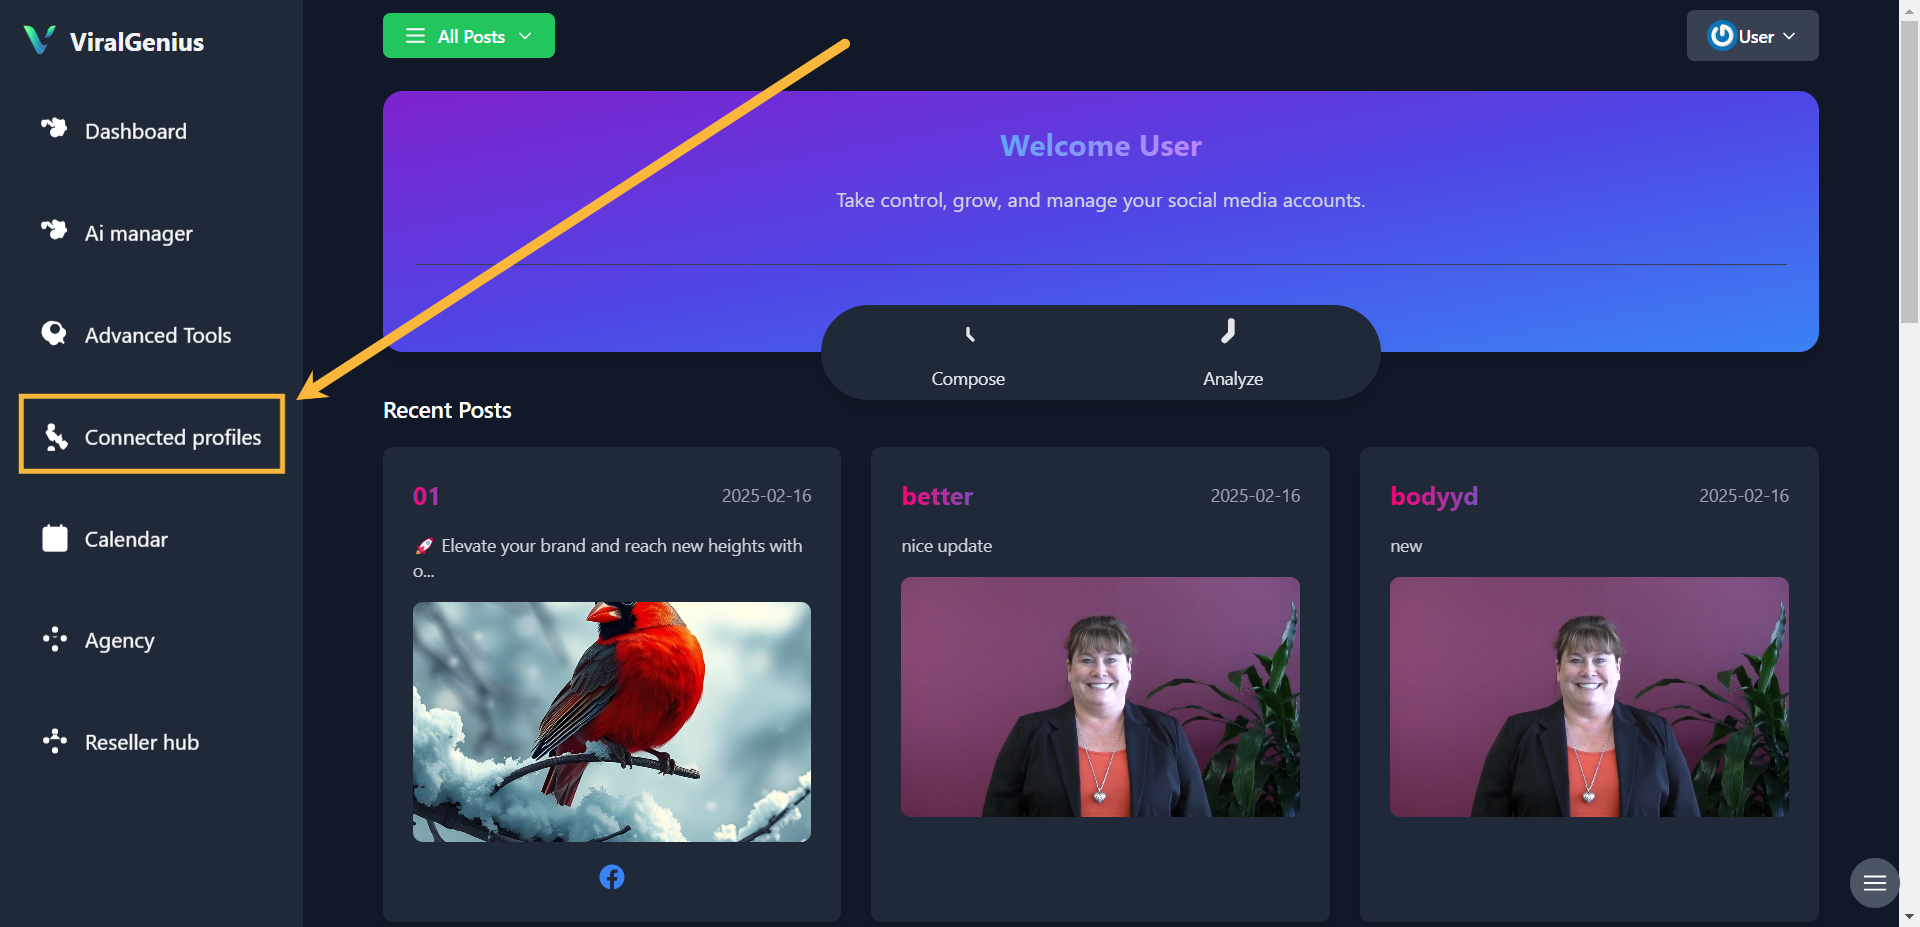
And here you have your WordPress account connected with your select categories
